Showing posts with label payment entry. Show all posts

Tuesday, 14 June 2016

How to enter online transactions in ERPNext?

If you are selling goods online and you are receiving payments online through any payment gateways like Payumoney,Paytm,CCAvenue and you are paying TDS for that then here is the solution for how to enter online transaction in ERPNext.


Step1) Consider that if you are a selling a product for Rs 250 then you have to create sale invoice for Rs 250 only. Customer will pay full amount for that and TDS amount will be deducted when transaction completes(ie When you receive that amount in bank).
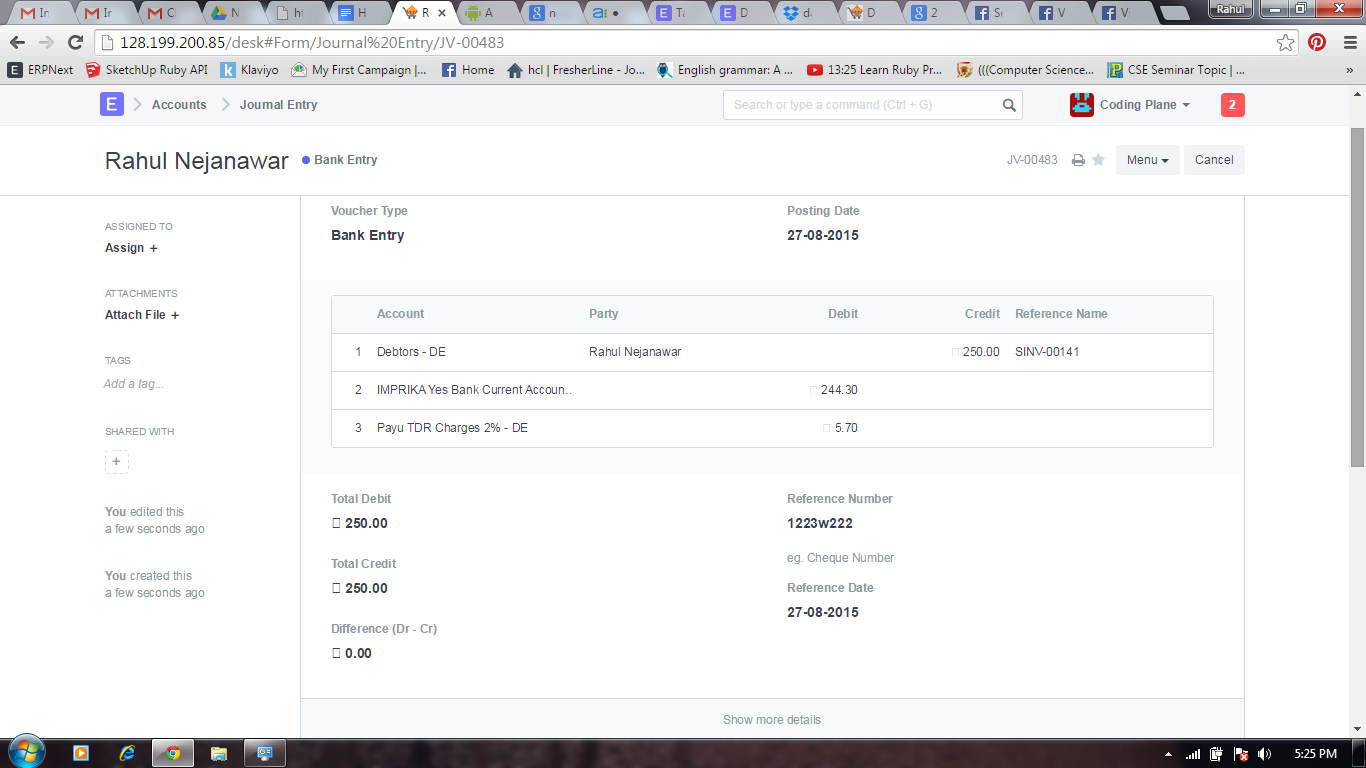
Consider that  you are using Payumoney payment gateway and payumoney charges 2% TDS and 14% tax on that. If customer pays 250 then payumoney charges 2% on that ie Rs 5 and 14% Tax on that ie Rs 0.7. Total Payumoney charges is Rs 5.7 and you will receive Rs 244.3 in bank.
Step2) While entering JV the Customer Account should be in credit side and your bank account should be in debit side and TDR charges will be in debit side.
mail12.png
Your JV should look like above.


How to create Journal Entry in ERPNext?

All types of accounting entries are made using the Journal Entry or Journal entry is an entry to the journal. Journal is a record that keeps accounting transactions in chronological order, i.e. as they occur. Ledger is a record that keeps accounting transactions by accounts. Account is a unit to record and summarize accounting transactions.
Follow these steps to create Journal Entry in ERPNext


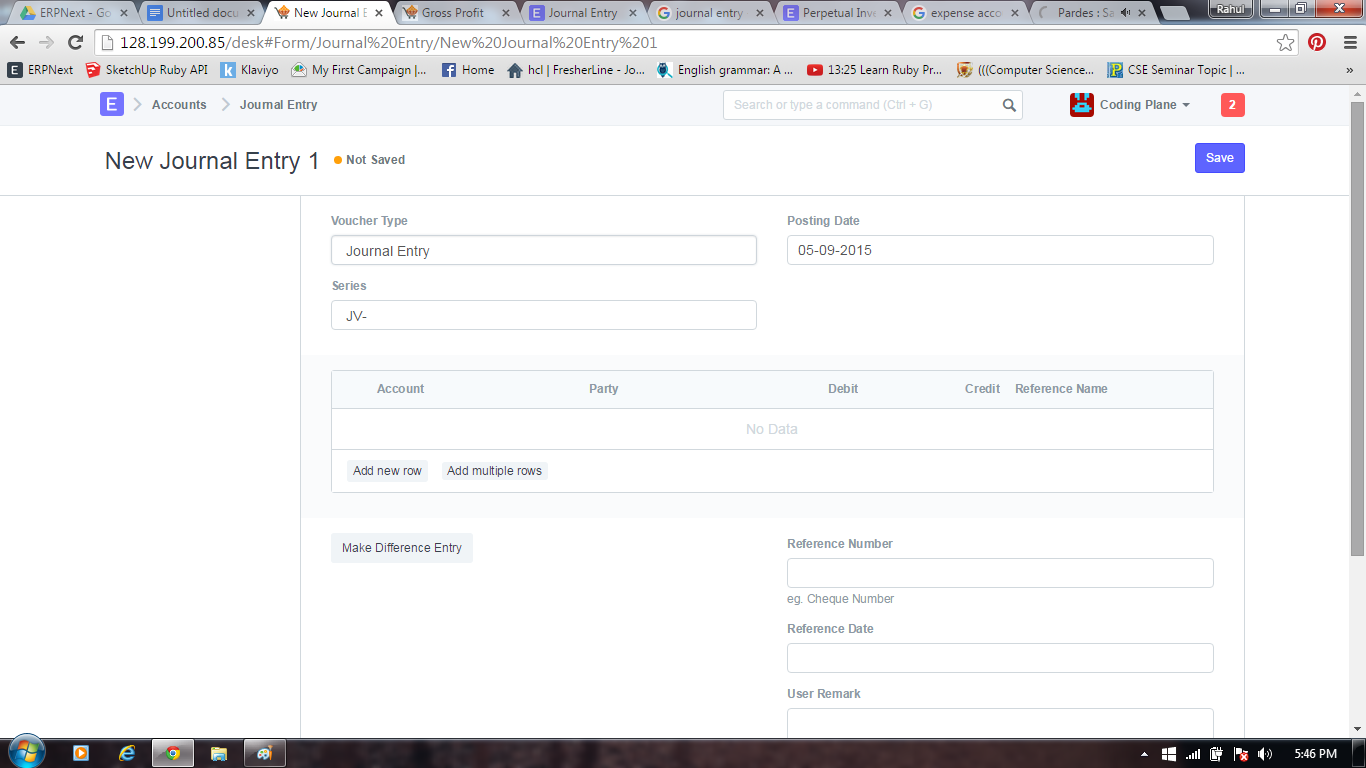
1)Goto Accounts->Journal Entry->New
mail67.png
you can see in the above figure,
In the New Journal Entry
Voucher Type-Here select the voucher type like if you doing entry for bank transaction then select Bank Entry or if you are entering cash transaction  then select Cash Entry in Voucher Type
Posting Date-On which date you are posting the JV/Journal Entry
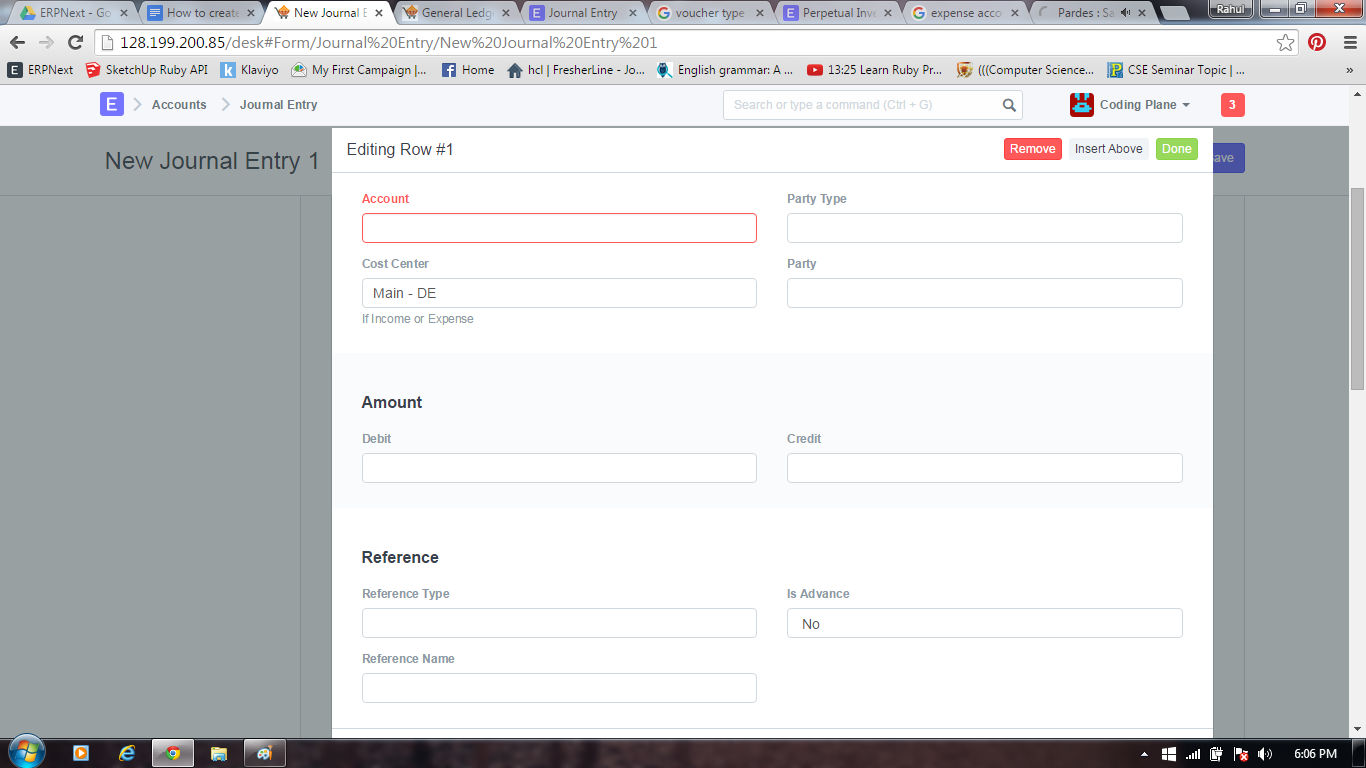
2)Add Accounts details in accounting field
mail68.png
In the above figure you can see
Account-Select respective account head
Party Type-Here Party Type means Supplier/Customer
Party-Select the party name
Cost Centre-Select Cost Centre for income/expense
Amount-Enter the amount to Debit/Credit
Reference Type-Select the reference type like sales invoice,purchase invoice,journal entry
Reference Name-Select the reference name like sale invoice no/purchase invoice no
Is Advance-Select “No” if you are not taking advance amount or Select “Yes” if you want to make selectable in an invoice.


3)After adding rows for individual account entries,Credit/Debit amount,Reference,the Journal Entry look like
mail69.png
In the above diagram you can see, Debitor and Creditor accounts and amounts. Creditor and Debitor amount should be equal, otherwise it will show difference amount in Difference field(Difference(Dr-Cr)) and also you cannot submit Journal Entry.


Difference(Dr-Cr)-The “Difference” field is the difference between the Debit and Credit amounts. This should be zero if the Journal Entry is to be “Submitted”. If this number is not zero, you can click on “Make Difference Entry” to add a new row with the amount required to make the total as zero.


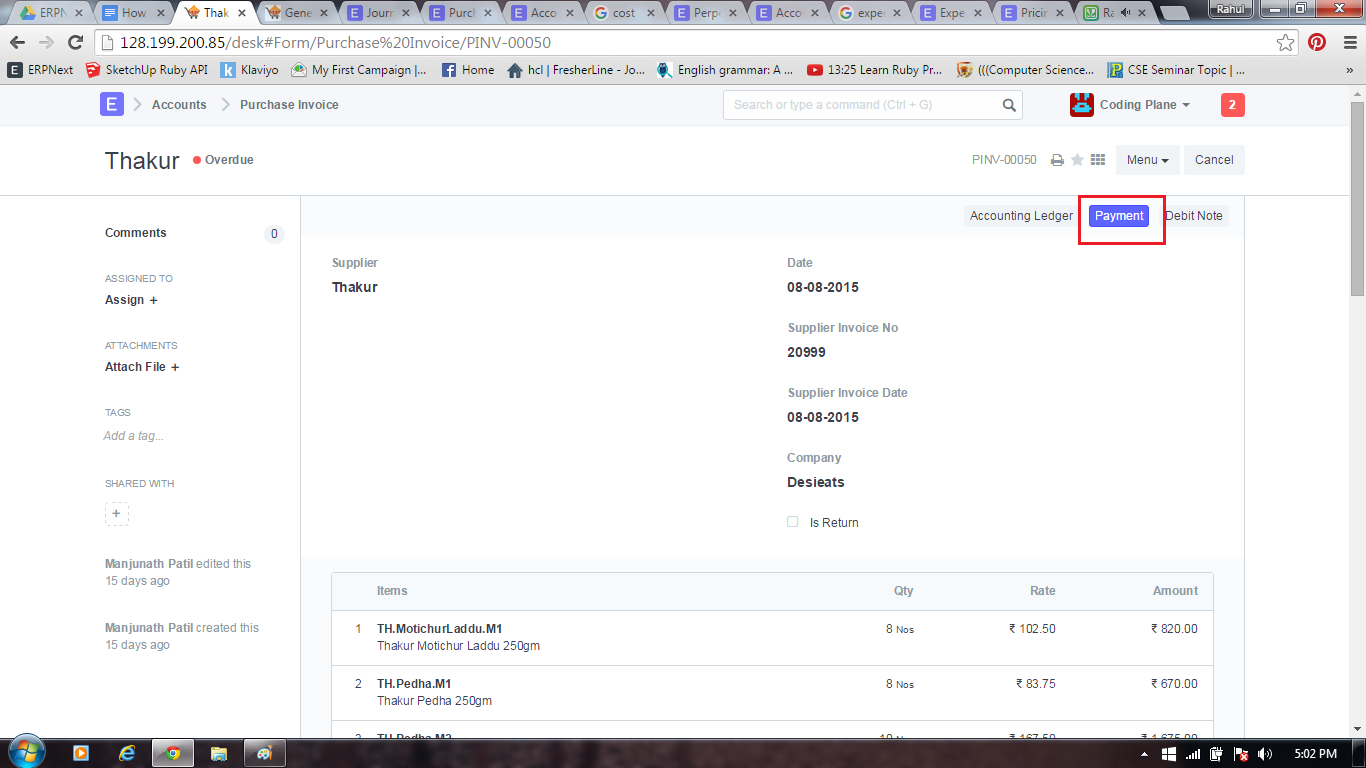
4)From Purchase Invoice/Sales Invoice you can create/generate Journal Entry/Payment Entry
mail66.png
In the above diagram you can see,you can create/goto Journal Entry by clicking Payment button in Purchase Invoice and it is same in Sales Invoice also.


5)Here you can see some common journal Entries for Food and Beverages/Telephone Bill/Rents
mail70.png

How to create Purchase Invoice in ERPNext?

Purchase Invoice is the bill that your supplier sends you for the products or services delivered or A purchase invoice is an itemized statement of the goods or services provided by a vendor or supplier. indicates the quantity and price of each product or service provided or to be provided.
Follow below steps to create Purchase Invoice in ERPNext
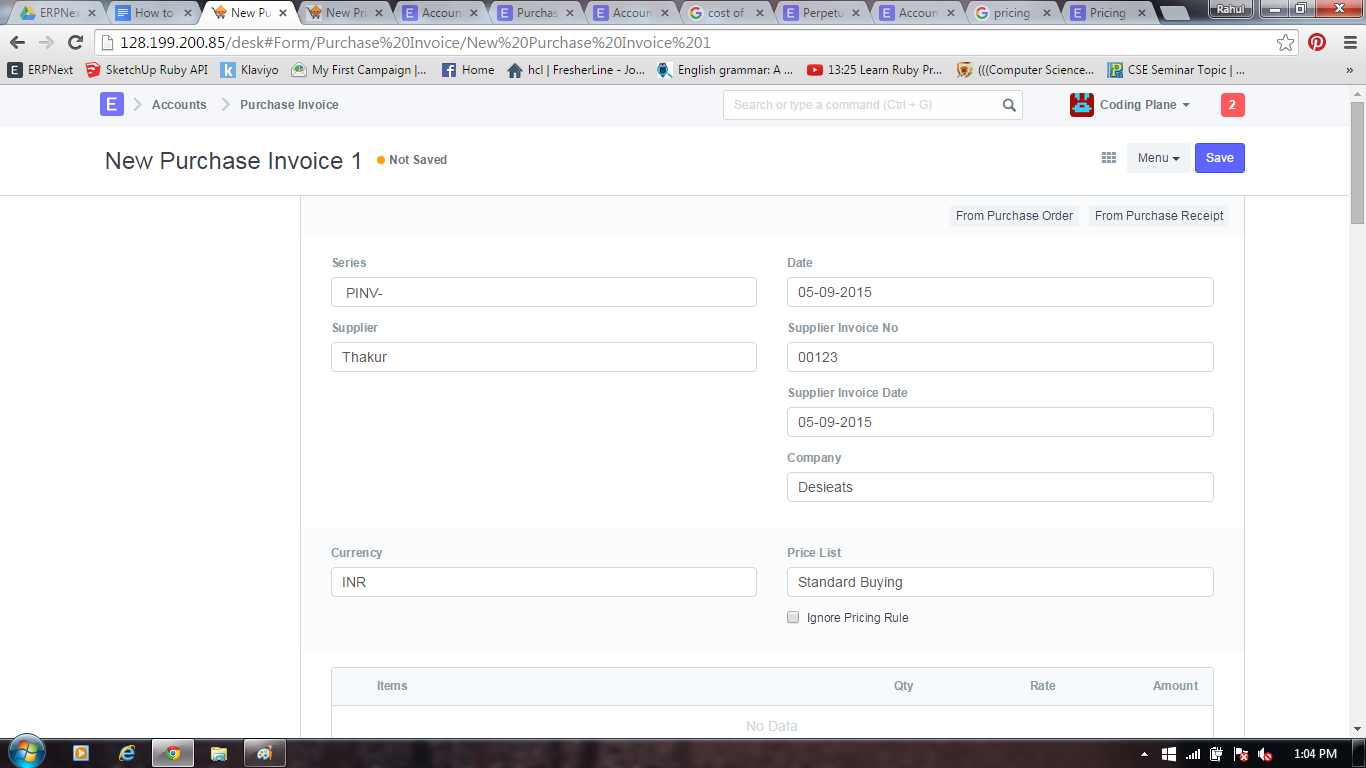
1)Goto Accounts->Documents->Purchase Invoice->New
or
You can create Purchase Invoice by clicking Invoice in Purchase Order/Purchase Receipt
or
You can create Purchase Invoice by clicking/importing From Purchase Order/From Purchase Invoice in New Purchase Invoice
mail60.png
In the above diagram you can see, we are going to create Purchase Invoice via Accounts->Documents->Purchase Invoice->New
Here you enter all the details of supplier like Supplier Name,Supplier Invoice No,Supplier Invoice Date etc
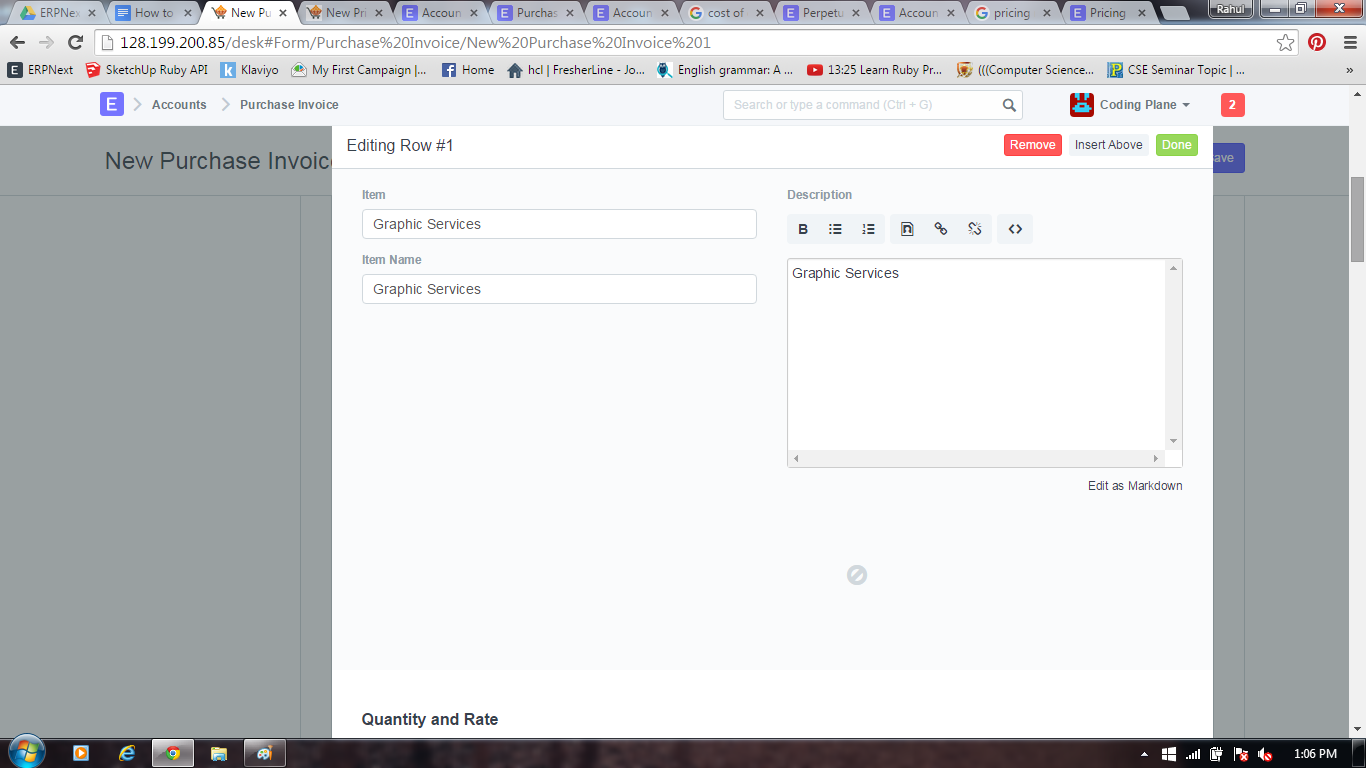
2)In the Item field add Item details as shown in below diagram
mail61.png
After that enter Quantity and Rate for Item
mail62.png
In the above diagram you can see, in the Accounting we have to add Expense Head/Expense Account Head
Expense Head-Expense Account is an arrangement under which money spent in the course of business.In the above digram you can see we added expense account head for item Graphic Services is Graphic Service - DE. Here Graphic Services is a service item so that we created separate expense account head for that.You can create separate account head for your service items.
If item is a stock Item and you are generating Purchase Invoice from Purchase Order/Purchase Receipt then no need to choose Expense Account Head because ERPNext will automatically
select Expense Account Head for stock items ie it will select Stock Received But Not Billed as expense account head in Purchase Invoice.
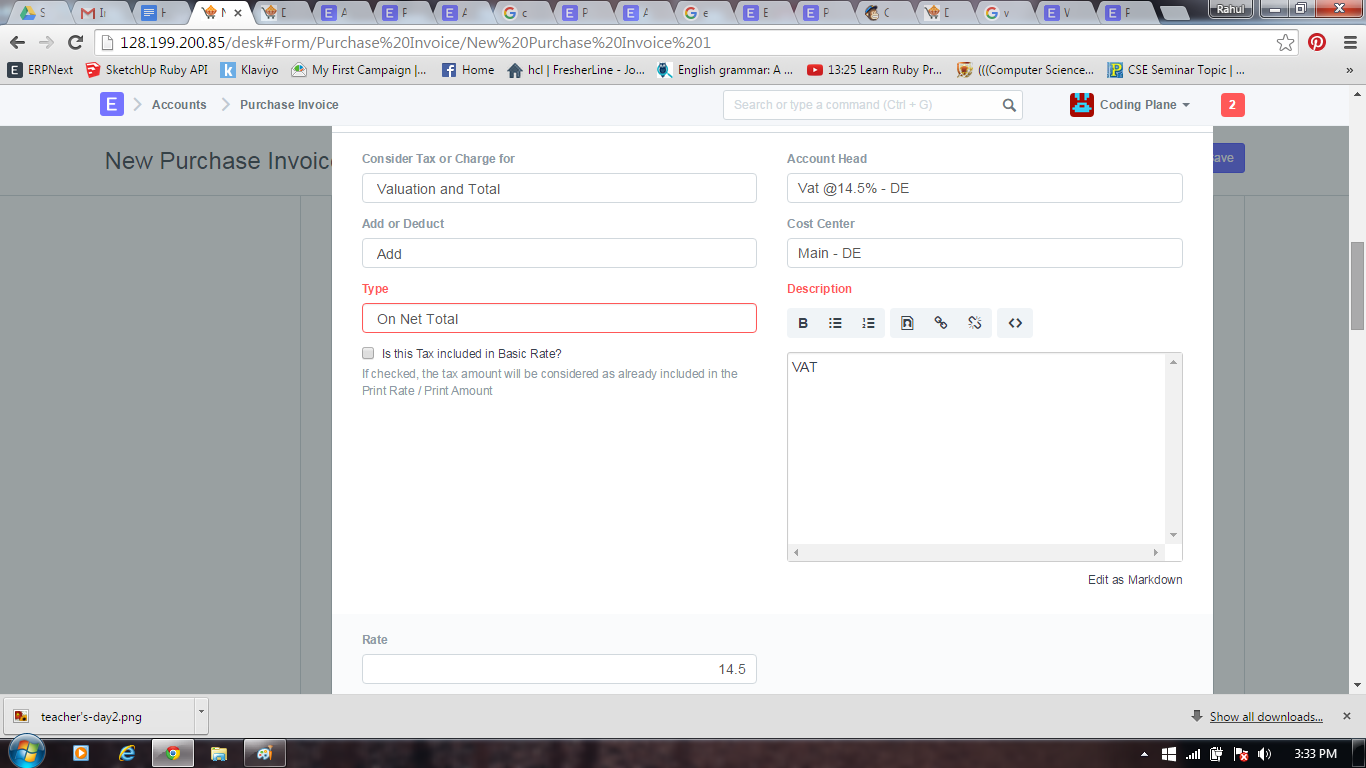
3)Add Tax value in Taxes and Charges field
mail63.png
In the above diagram you can see how we added Taxes and Charges
Here you can select separate account head for taxes like Vat,Service tax,TDR
4)After adding all data in Purchase Invoice Save it and Submit.
After submitting Purchase Invoice check ledger to see how accounting entries are done
mail65.png
In the above figure you can see,How Accounting entries for Purchase will be made
Credit
Supplier account will be Credited(here account head is Creditors - DE)
Debit
Tax(VAT@5.5% - DE) and stock expense account(Stock Received But Not Billed - DE) will be Debited